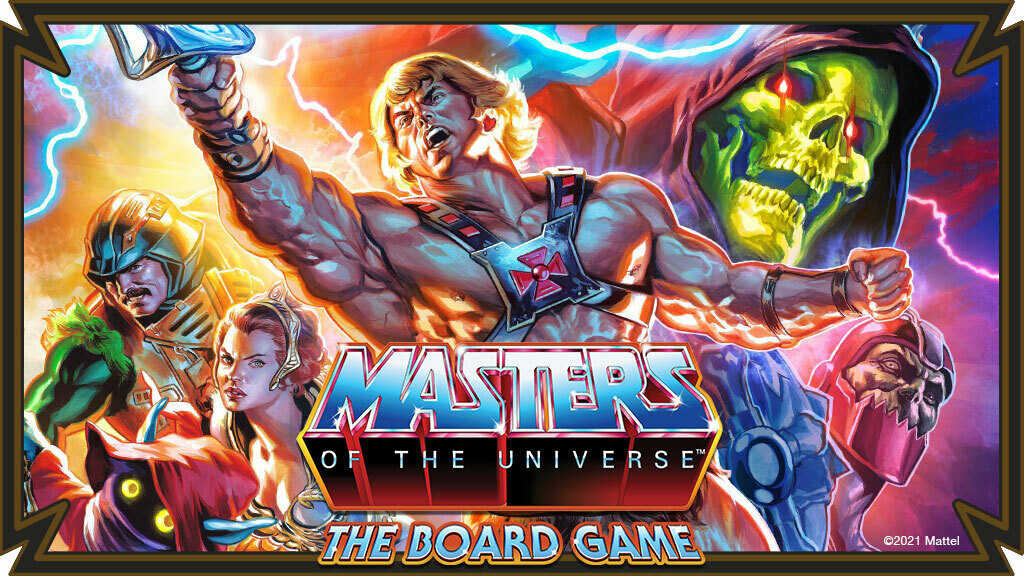
Masters of the Universe: The Board Game - Clash For Eternia
Created by CMON
All late pledges come with the same promos as regular pledges and will be shipped at the same time, around October 2022.
Note: In order to purchase an Optional Buy you must select one of the Pledges
❗️This project will not ship to Europe or Africa!
Unfortunately, due to licensing and contractual obligations this project will not be available to Europe and Africa.
TERMS AND CONDITIONS
By confirming your order, you agree that this sale is final and no refunds will be issued except at our absolute discretion. You further acknowledge that the final look, materials and content of the order (and the project) are subject to change and may differ substantially from what is presented on Kickstarter or other relevant site. You agree that our responsibility to you is to ship your order as entered into the pre-order system, that title and risk passes to you upon delivery to a common carrier for such shipment, and you are responsible for import duties or any other duties that may be payable to the relevant tax authorities. You are also responsible for providing correct address information and ensuring this address is deliverable by normal methods. Refunds will be net of all handling costs and credit card processing fees. Refunds and/or cancellation requests will only be considered before we begin the process of packaging your pledge for shipping.
If you do not accept these terms, please do not confirm your order.
Latest Updates from Our Project:
Plastic Samples: Assault on Castle Grayskull
about 2 years ago
– Sun, Aug 07, 2022 at 08:19:56 PM
By the power of Grayskull!
Hello Eternians, for this week's update, we're going to take a look at the plastic samples for the Assault on Castle Grayskull Expansion. We've also received the plastic sample for the Castle Grayskull plastic upgrade and its accessories as well. There's a good chunk of things to cover this week, so sit tight and we hope you enjoy it!
And if you've missed our previous plastic updates so far, here's a list of updates so far:
The first miniatures you'll find in Assault on Castle Grayskull are Randor's Guards. The Resin is on the left, and the final PVC plastic is on the right. The correct color and final size are the plastic samples.
Next are the 2 Skelcon sculpts. They're looking bad-ass.
And here's a group shot of the minions.
We noticed that one or two Skelcons out of the batch were leaning forward a little. This was from the warping that occurred during the plastic cooling. We provided feedback to the manufacturer, and it will be fixed for the final product.
Double the content this week as we also received the plastic sample for Castle Grayskull and its many accessories! Here's a look at the castle accessory pieces that come with the pack.
Flag
Weapon Rack
Training Dummy
Ladder
Laser Turret
And a shot of everything together.
With accessories covered, let's jump to check the castle sample! We had seen an early version before, but now we have the final sample, with the correct colors, improved details, and hinging Jaw-bridge.
Front view with Jaw-bridge closed.
Front view with Jaw-bridge open.
Left side
Back of the Castle
The right side, to complete the rotation!
Next, we jump straight to testing fit on the Neoprene Mat we received previously.
As per the Ruins Plastic Update, we increased the Castle and Cliff sizes with the hex size increase. We still had to make sure the cliff faces were slightly narrower than the hex, accounting for the fact that the Ladder and miniatures would crowd the cliffs during the siege.
Atop the castle, these are where the accessories will go for the Assault on Grayskull scenario.
And as a happy consequence of casting the Laser Turret where it pivots, the final plastic only needed to be snap assembled, locking the gun in place with its stand. This meant the part was movable! Imagine our glee when we first found out the turret was adjustable!
"Captain! Left wind, full, hold 1.5 MOA left of target center. Send it!"
But no time to celebrate, Skelcons are advancing from the front of the Castle. Not even the steep cliff steps will stop them!
A close-up of the Jaw Bridge. Attacking Skelcons have brought it down!
And to make matters dire for the defenders, it seems the ladder has been deployed on the side of the cliff, allowing the Skelcons to advance further!
Fret not, we have guards deployed on the side of the castle, ready to defend it with their lives!
And finally, here's a shot of everything we showed today, laid out in full view on the Neoprene Mat. What a presence this has on the table!
And that's it for today, Eternians! We hope you enjoyed seeing the samples and the progress we've made so far.
Until the next update, You have the Power!
Print and Color Proofs: Core Box
about 2 years ago
– Thu, Aug 04, 2022 at 07:22:22 AM
By the power of Grayskull!
Hello Eternians, as our manufacturers are hard at work revising plastics, let's take a break from them this week to see the stack of core box print proofs that came in this week!
Before the printers ever see our files, we send all text for extensive proofreading with our editing team. When the factory receives them, they send us print and color proofs for us to check and approve the files. In many cases, prints have variances from digital files that are not spotted until the files are actually printed.
On this step of the process we have to be very thorough, as in many ways, this is one of the final steps in quality assurance before mass production commences.
As we mentioned before, this week we received the first print and color proofs for the core box. They usually come in a roll or stack of paper.
What we do now is meticulously comb through the print proofs for spelling, color, and graphic errors. What shows on our screens is not physically replicable in print sometimes, and not every player will have perfect lighting, so this is the step where we fix those issues. In some cases, brightness and contrast need to be adjusted to ensure readability and to account for differences in levels between what we see on screen and on paper. Zooming in on a computer is so natural that sometimes we forget during digital reviews that it's not possible to do on physical components (at least not without help from a magnifier!).
Top of Box
These print proofs replicate specifically how the final colors will turn out. They also come with guides to check print alignment and color accuracy. What we see here will be what you see when the game reaches you.
Top of Box and Spot UV
The pink print proof on the right of the top box is the spot UV print. The pink sections demarcate where a clear polymer coating will be applied to the top box print, to give specific areas a nice sheen.
Game Board and Punchboard Tokens
As this is the print proof stage, we double-check the token count and color accuracy. There is also a dieline file that tells us how the machine will cut out the punchboard. We ensure that lines up well with the token file.
Character Cards
The Character cards are the highlight of this set. While it may be proofread, spell checks do not account for incorrect stats. Each of the character's abilities and values must be double-checked against developer files to ensure they were transferred correctly. No use having a spelling error-free game if Orko suddenly has more health and armor than Ram Man!
Controller Cards
The opposite side of the Character cards is the Controller Cards. There is also a stack of AI cards for playing solo.
Skill cards
Skill cards take up the bulk of the work here just from the sheer amount of text. Just like stats and values for the character cards, we'll need to double-check the text, their abilities, card costs, and if they're assigned to the right character.
Activation cards, NPC cards, Summary cards
The remainder of the cards is the batch of activation cards, terrain cards, NPC cards, and summary cards. We noticed minor color variations on some card backs, which will need a revision as well.
Rulebook and Scenarios book
There's also the rulebook and scenario book, both taking time and much patience to run through each line, text box, and graphic example. All in all, the colors are replicated very well across the board, with little to no noticeable color variation.
Book proofs usually come large spreads of pages, but we mounted them to resemble actual books to evaluate in a way that's closer to the experience of reading them:
And after 2 more shots of coffee, we're off to the races with the scenarios book. ☕
After a couple of days of looking through the core box print proofs, we've collated comments regarding minor color differences and inconsistencies that we're fixing. We've also decided to bump the brightness on certain components to increase contrast and readability. Everything else looks to be in order and once the revisions arrive, we'll do this process again until everything is completely approved.
At the same time, the printer is currently preparing the remaining files for the project, so we should be expecting print proofs for the rest of the expansions coming in soon as well. We're a step closer to mass production.
And that's all for this update, Eternians! Do you like what you see so far? Let us know what you're most excited about in the comments.
You have the Power!
Plastic Samples: 3D Nature Set
over 2 years ago
– Sat, Jul 09, 2022 at 07:49:56 PM
By the Power of Grayskull!
Today, Eternians, we're going to take a look at the process of creating the 3D NatureSet as well as check out the first plastic samples of these terrain pieces. If you haven't checked out the 3D Ruins Plastic Samples we showed previously, you can find that update HERE!
To recap, this was what we showed you during the campaign.
NOTE: Some of you pointed out in the comments that the 7-hex tile is missing from the banner. This omission was a mistake on our part, as the 3D render was simply not created.
Our goal with the 3D packs was to replace every cardboard terrain, so please be ensured that you will receive the following 10 tiles and plants in your 3D Forest pack:
2x 3-Hex Forest, Curve
2x 3-Hex Forest, Triangle
2x 3-Hex Forest, Straight
1x 4-Hex Forest, Cross
1x 5-Hex Forest, Wide
1x 7-Hex Forest, Large
7x Plants, varied
1x 10-Hex Water
With the plants, we envisioned a modular plant system where players could create a variety of terrain with the different plant configurations.
With the previews out of the way, let's get down to brass tax.
When planning for the 3D Forests originally, we absolutely wanted to create 3D foliage and scenery on it. But before we could start with any of that, we needed to establish our working space.
By laying out the miniature bases on the 3d model, we were able to see how much space we could cater to 3D details between the bases and how tight the space would look with the roots and grass.
Once we measured out the space, we realized that even with the soil texture, it still looked a little sparse. We wanted to have texture across the entire terrain piece, so we tested and tried different root and leaves heights, ensuring miniatures still stood stable above the added texture.
In this iteration above, there are groove lines running across the entire hex grid, clearly defining each hex. While good for gameplay, it wasn't the natural look we were trying for. We then decided to remove the indented hex grid, demarcating the borders by clever placement of longer roots.
The larger roots would naturally form dividers between the hexes, demarcating the grid for better hex visibility and differentiation, keeping the immersion of a forest texture.
We then studied flora references of Masters of the Universe, creating the 3 types of basic plants, and creating holes and pegs for each terrain piece and plant.
And now, the forest terrain was ready to be worked on by the manufacturer. At the same time, we were studying the details of the lake. Wanting a more seamless transition from land to water, we decided to create a shoreline around the lake, with clear markings for the hex grid.
We did a quick 3D print of a section of the lake to check the alignment of the grid on the terrain tile, after which we adjusted its thickness based on the board's hex border.
And with further details added, more rocks, lily pads, and shrubbery, the lake was finalized as well.
This brings us to now! At our request, the manufacturer sent us two plastic colors to choose from. We were split about which green to use for the forest floor. We had a pale green (left) and a saturated green (right).
The pale green had a more earthy, natural look, while the saturated green was a more vibrant, "cartoon" look.
Ultimately, we decided on the more saturated green (right) as it contrasted against the yellow of the board better. Ultimately, readability for gameplay takes priority, and the brighter green better reflects the lush forest scenery of Masters of the Universe.
We also tested for board fit here. We had increased the size of the Forest as we did with the Ruins, so we measured everything and made sure the new forest terrains were not too small for the larger grid.
We then tested each of the plants and their stability on each of the holes. The below shows 3 filled holes on the 7-hex Forest tile.
And most importantly, we wanted to make sure the miniatures fit, as well. We loaded up the 7-hex base with the miniatures (and mounts) and slotted each plant type into the holes.
Filling out a Forest terrain would be a rare occurrence, but if it does happen, the minis do fit together with no concerns. And in any scenario where a figure is blocked from fitting well onto the Hex, the plant can simply be removed, as intended by design.
The plastic Lake tile arrived, and we found the color and fit to be great. It is unpassable terrain so there was no need to test miniature stability or include grid lines. The color contrast against the board was fantastic as well, so we've approved this with the manufacturer.
And that's all for this update, Eternians! What do you think of the process and samples? Let us know below.
You have the Power!
Plastic Samples: Wrath of Snake Mountain
over 2 years ago
– Fri, Jun 24, 2022 at 11:18:57 PM
By the Power of Grayskull!
We have a deadly update today, including Clash for Eternia's biggest, baddest character: Tyrantisaurus Rex! That's right, we have plastic samples for Wrath of Snake Mountain to show you! And if you've missed any of our previous plastic sample updates:
For these miniatures, we focused particularly on the differences in scale textures, intent to show each character's uniqueness. As we go through the minis from this expansion, check how many different types of scale/plate textures you can spot 🐍!
Wrath of Snake Mountain
Disclaimer! These are the first plastic samples (or T1s), which means they willgo through rounds of improvements before their final form.
King Hiss
Serpentine King Hiss
Rattlor
Tung Lashor
Kobra Khan
Sssqueeze
Snake Face
Snake Troopers
Tyrantisaurus Rex
Scale comparison
And that's all we have for today! Which character are you excited most about from this expansion?
Until then, you have the Power!
Plastic Samples: 3D Ruins
over 2 years ago
– Tue, Jun 21, 2022 at 09:01:32 PM
By the power of Grayskull!
Hello Eternians!
Today, we’d like to share with you a bit of the process behind the production of the 3D Ruins and also show you their first samples. Here's a quick recap of what we showed during the campaign:
Essentially, we set out to create 3D versions of the Ruins tiles, to elevate the aesthetic experience of Clash for Eternia on the tabletop and provide a physical counterpart for the models. This is what the 5-hex Ruin cardboard overlay looks like:
First, we needed to determine the height of the Ruin walls. From a gameplay perspective, this Terrain blocks line of sight and we wanted to convey that. We also needed the figures to be easily picked and moved around. The plan was to start with as high as we thought made sense and work from there. Here's how it turned out:
Reducing the height to around the figure's chest level seemed better. We also wanted the ruins to feel more organic, and demarcate the entrances better. We eventually decided that sloping edges would solve that.
Now with a better idea of the numbers, our manufacturer helped us determine how thick the walls needed to be structurally sound for their height. The final thickness was more than originally anticipated, constricting the spaces, especially at the entrances which were surrounded by more walls.
And this is where we faced options on how to address this.
1. We could reduce the figurescale. The least intrusive solution. However, we were happy with the current scale and would not change it unless absolutely necessary.
2. We could retain the figurescale but reduce the base size. However, this would mean the standing space for the figures would be smaller, which would mean compromising the poses of the miniatures.
3. We could reduce the wall height, allowing for a thinner wall. We discussed the possibility of using different plastic mixtures with the manufacturer to allow for thinner walls while retaining their height. But no reduction would have been substantial enough to account for the space needed to fit the figures.
4. We could increase the hex size on the board. We could essentially enlarge the grid without constraint, allowing for the Ruins to sit comfortably with figures in every space. This was the route we eventually took. We measured out the new dimensions, accounting for the new wall thickness, and ran print tests for the new grid size.
Here you can see the updated hex size against the size of the old 3D ruins.
With this decision, we knew it was going to have a cascading effect throughout the production, modifying the game board, neoprene mat, game tokens, as well as every other terrain tile and 3D terrain counterpart. This even slightly enlarged the plastic Castle Grayskull as well!
We would need to re-render every single existing art asset and re-lay the new, enlarged grids over them. The reason for doing this instead of simply blowing the art up is that pixelation would occur. So, while our graphic designers were handling the overhaul, our sculptor continued improving and refining details of the 3D Terrain, adding beams and shrubs and textures to the sculpt.
We made sure the figure bases would fit with spare space on the entrances.
And finally, with the assets updated and numbers checked and double-checked, we sent it to the manufacturer. With new samples in, we made sure they fit neatly on the enlarged hex grid.
And with the specs confirmed and physically checked, we were able to proceed with the other Ruins. This brings us to where we are now. Lo-and-behold, the first plastic samples for Ruins Terrain.
Testing them against the Neoprene mat, we made sure that the plastics fit nicely around the adjusted hexes, accounting for any shrinking that would usually occur during plastic production. We were also testing for color contrast, making sure the Terrain pieces looked distinct against the map.
With a variety of shapes, sizes, and poses, we made sure to provide ample space for the various combinations of miniatures to fit comfortably in the Ruins, including the Mounts.
It's a party!
We also made sure to test the ruins back to back. Even though our scenarios don't call for such clusters, we want our players to be able to customize their maps with any piece in any way they want, and this test makes sure that was possible.
That’s it for today! What do you think, Eternians? We hope you enjoyed that look behind the scenes. Let us know what you think of these 3D Ruins.